ThinkPad T420 external flashing
Read the Ivybridge/Haswell common guide if you want more information. Please note, for Thinkpad T420, splitting the rom is not required. The following instructions expect you to have these on hand:
- a clone of lbmk, can be obtained from
https://codeberg.org/libreboot/lbmk - necessary tools (flat-nose pliers or sleeve tool, screwdriver, small crowbar)
- some CPU grease
- a pack of backup screws
- a programmer
Preparing a release Rom
Please follow this prior to flashing, or you may brick your machine.
Please inject vendor files prior to flashing. You can also use this guide to change the built-in MAC address for your Intel Gigabit Ethernet device; doing so is advisable, because otherwise you will have a default, generic MAC address.
Disassembly
Be patient when trying to disassembly Thinkpad T420, the disassembling is relatively complicated. You need to take the main board off the magnesium structure frame, for a complete disassembly.
Since there are a lot of screws on it, you need to at least get few spare screws in case that you messed it up. And also, using each screw only once is recommended.
The disassembly guide here aimed to be simple and clear. But if you are confused, the ThinkPad T420 Hardware Maintenance Manual is always your friend.
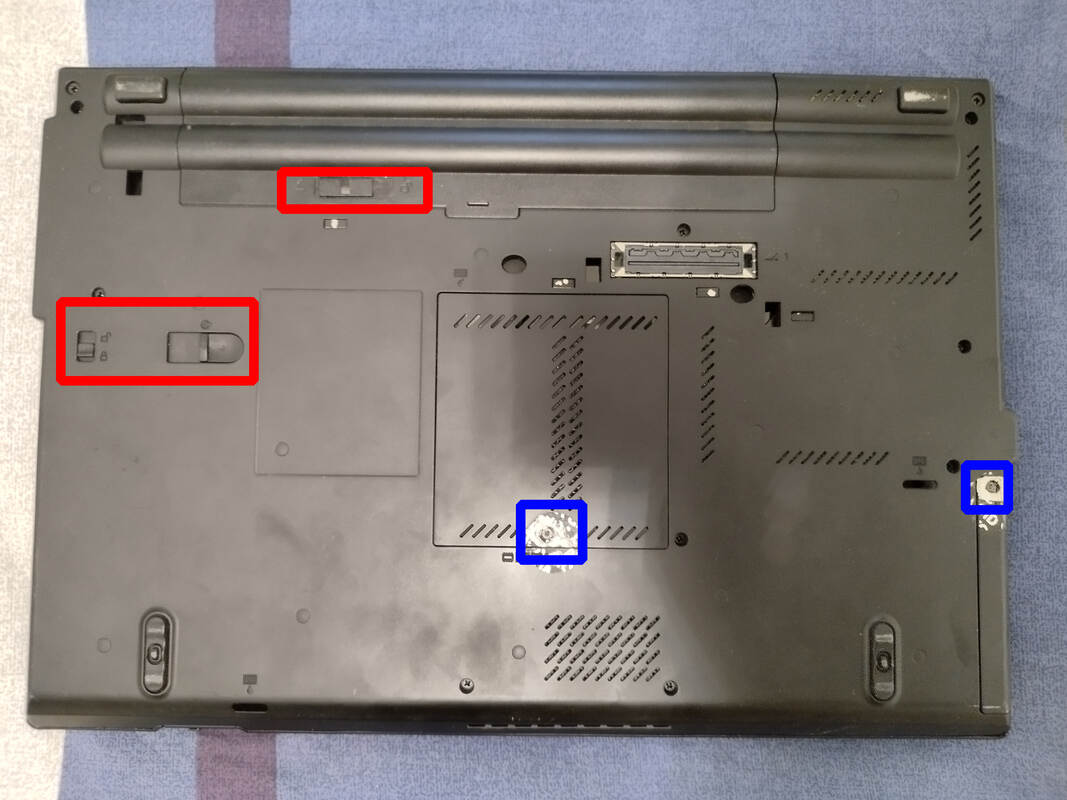
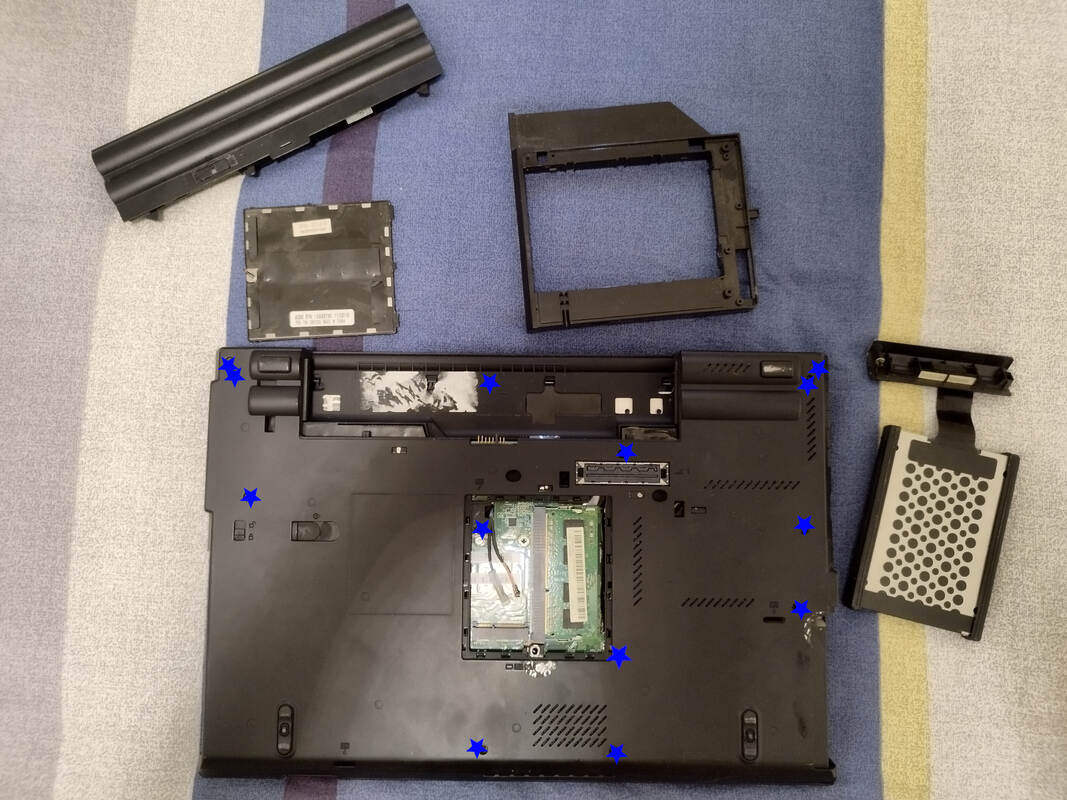
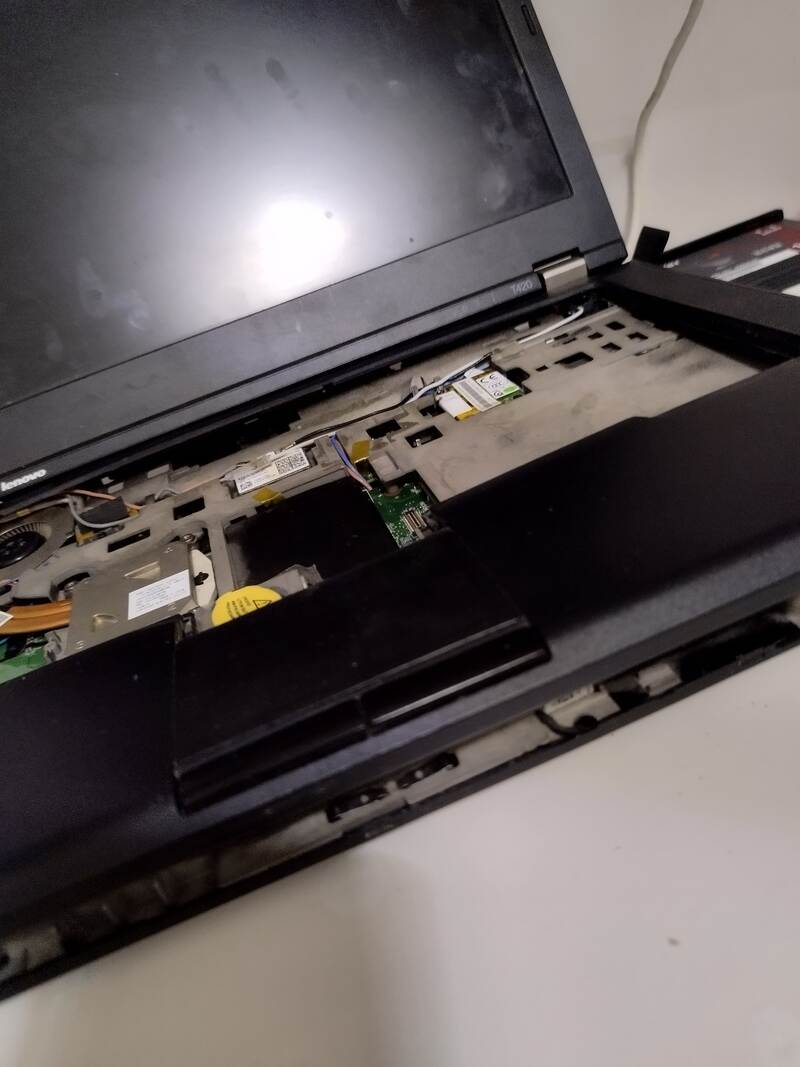
Start by detaching some plates, main battery, and the ultrabay. Loosen the screws (in blue border) but don’t remove it, and just pull out the plates. For the battery and the ultrabay, just unlock it and detach it. If you have any expresscard, SD card attached, also remove it.
Next, remove all the screws on the black cover.
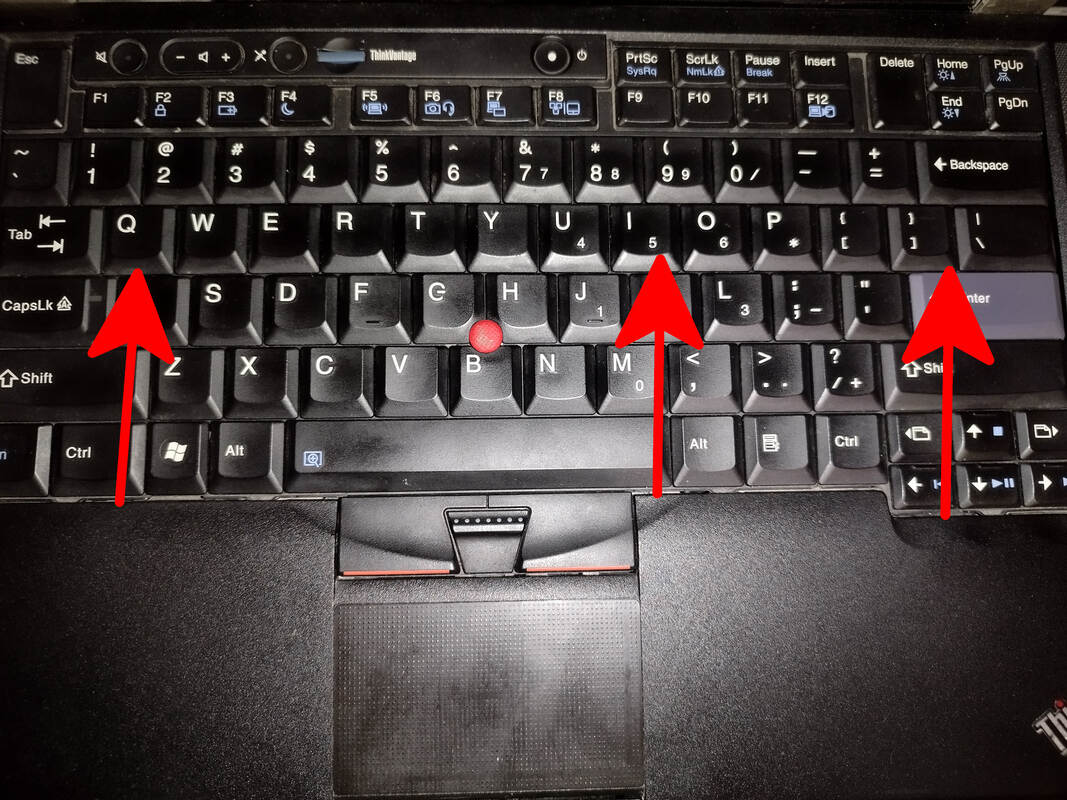
And now, you will able to remove the keyboard. Slightly use the crowbar to push the keyboard towards the screen to remove it. Also, pay attention to the cable under it, pull it off gently.
Now you can pull up around the sides of the front cover (the one with keyboard removed) to release it. Pull it upwards and lift it, pull it back to remove it. There is also a touchscreen cabel under it, pull it off as well.
Remove the red screws first to remove the speaker and pull off the cabel. Then, remove the pink screws and remove the modem, the telephone jack and the wireless WAN card. Pull out the anthenna cabel around them (You may need to remove your wireless WAN card in the back and push the cabel to the front). And, you need to remove the green screws and the connector in the blue box (of the picture). And then, lift up the screen to remove it.
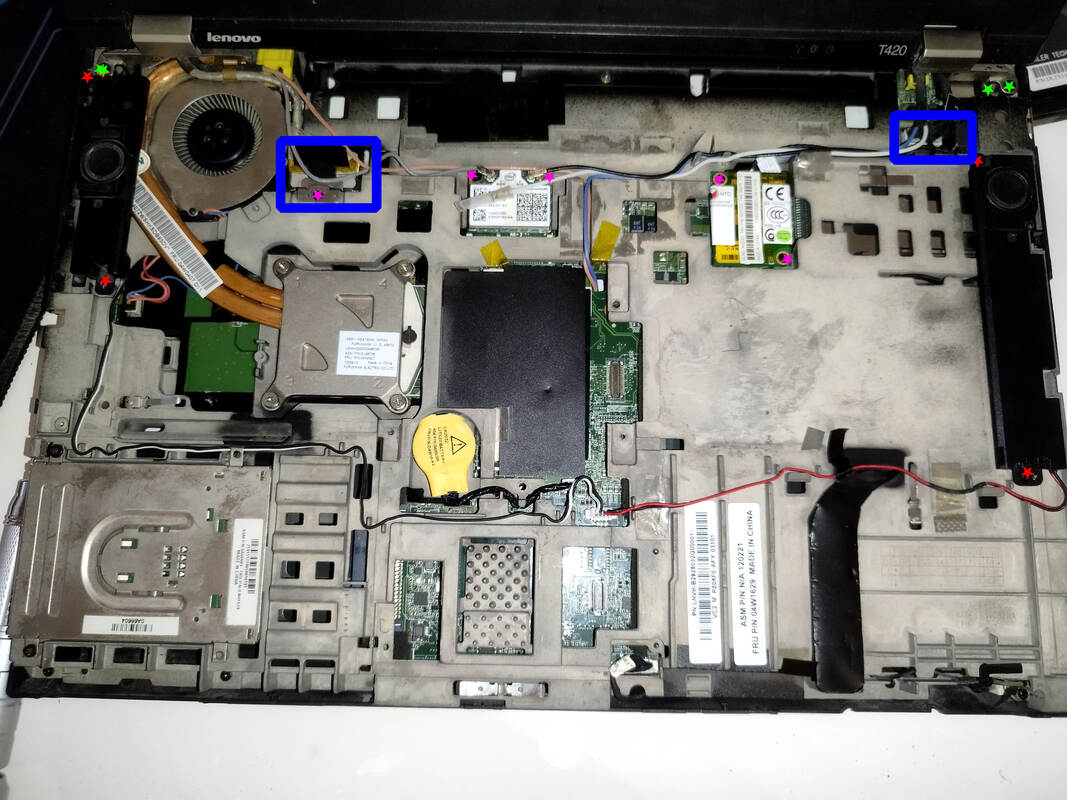
Remove the blue connections and the USB port. Then, remove the red screws and connection. Gently pull up the fan to remove it. Next, remove the pink screws (the position in picture may not be accurate, watch out for all the screws there).
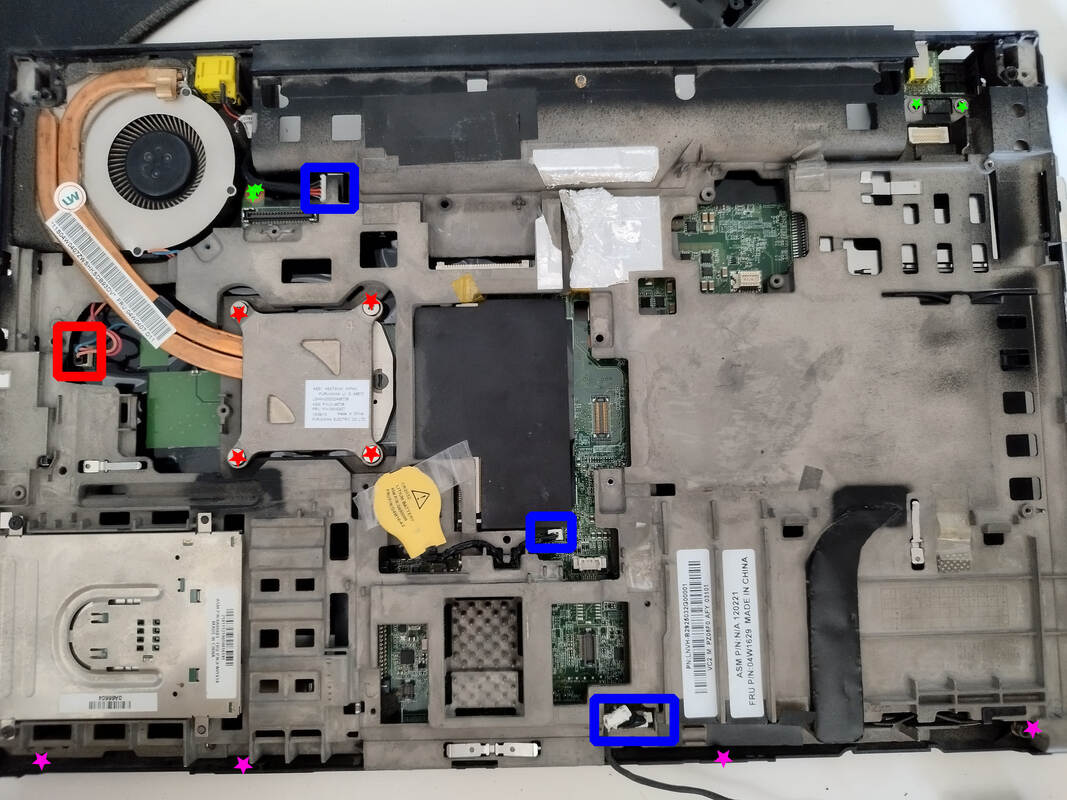
Now you can pull the bottom cover off. Turn it back, remove all the visible screws. Use your flat-nose pliers or sleeve tool to unscrew the VGA port. And you can pull your main board off the magnesium structure frame.
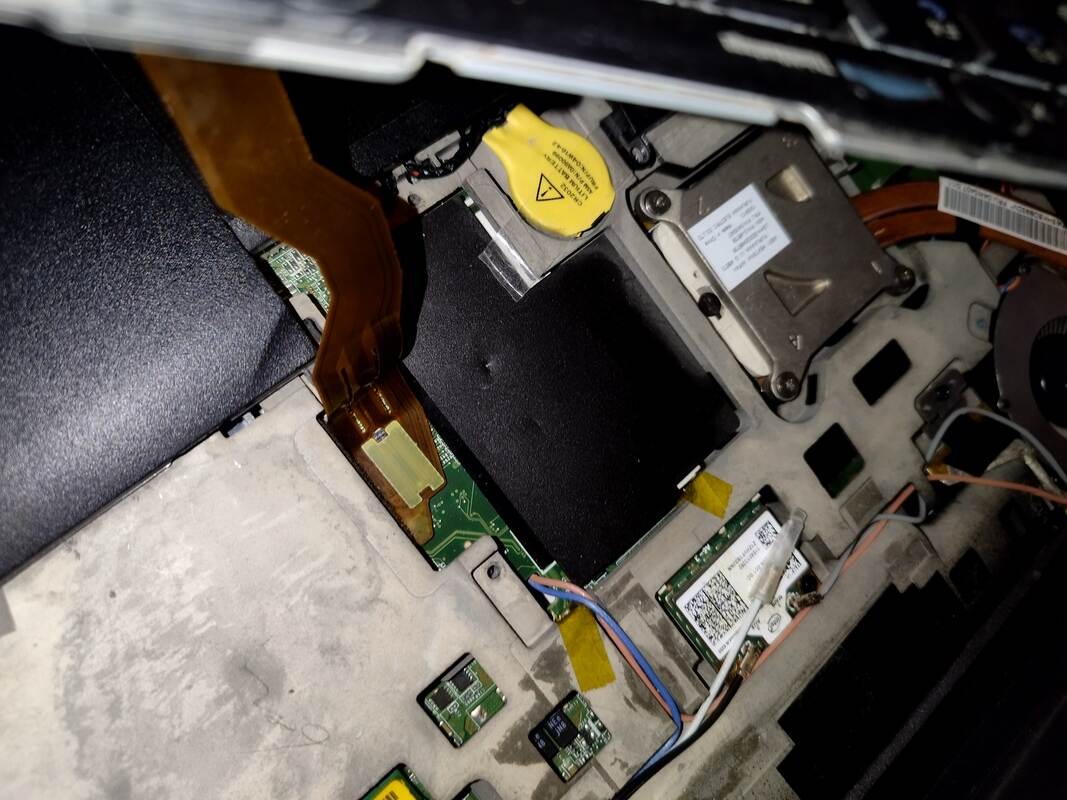
You will see the eeprom on the front:
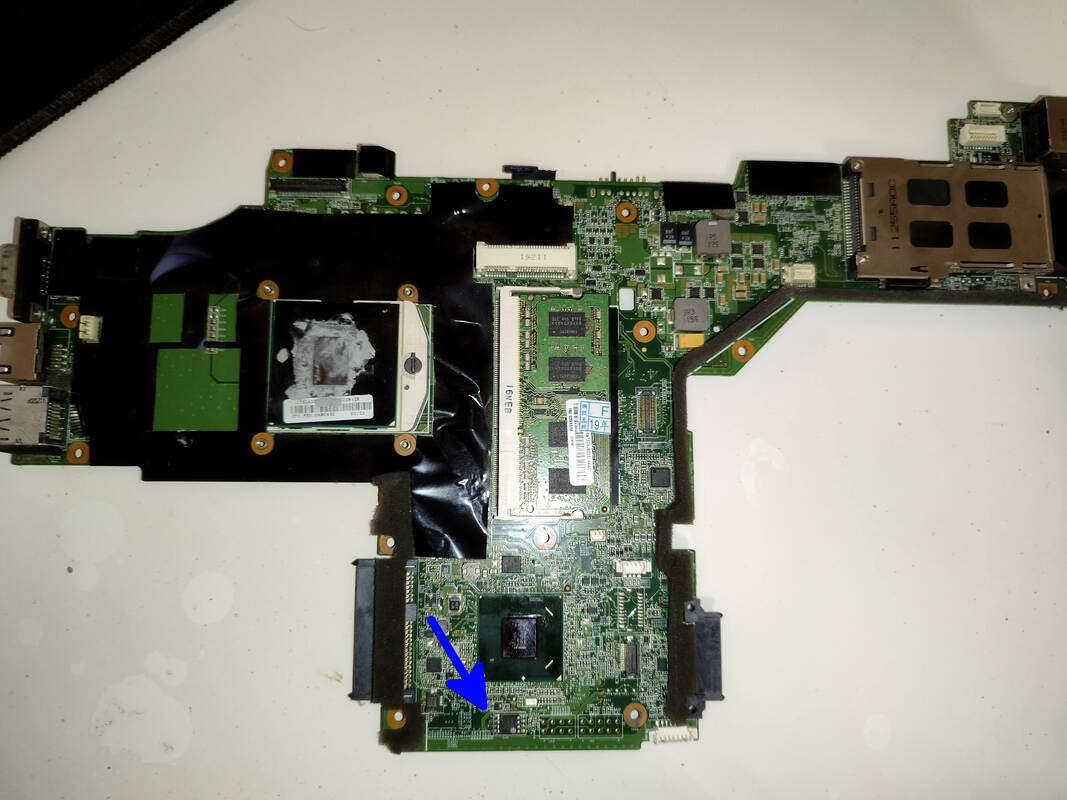
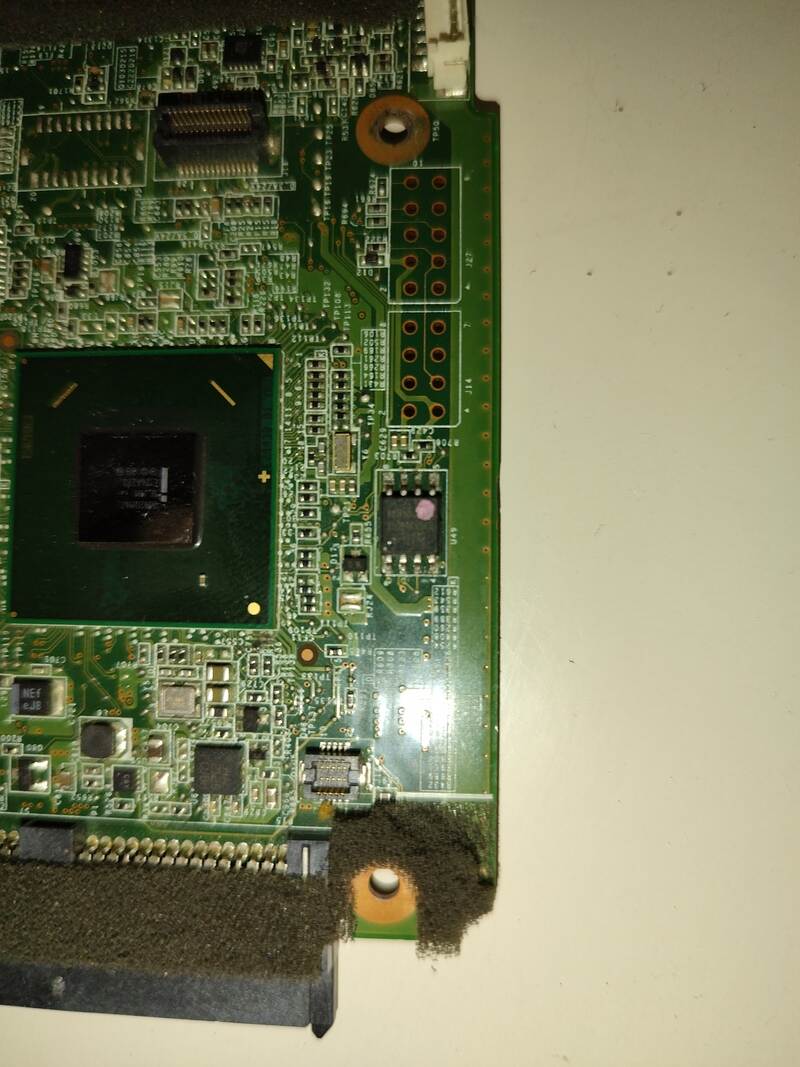
The flash will likely be Winbond W25Q64CV. You may double check it by looking at the silkscreen.
Now, you can proceed to flashing this machine.